
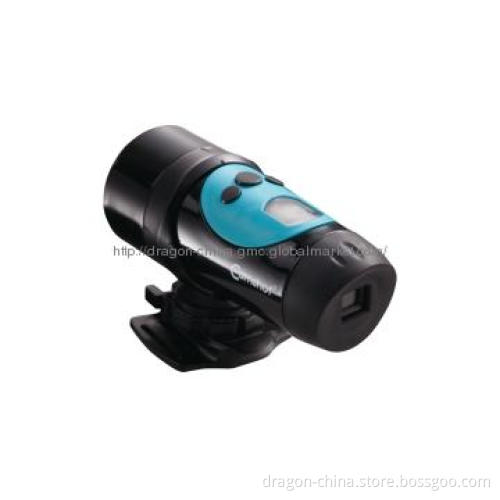
The Hot Selling Helmet Action Camera ER0808
Quantity:
Your message must be between 20 to 2000 characters
Contact NowBasic Info
Basic Info
Product Description
Product Description
Basic Specification
Detail Description
Technical Specification
Turning On/Off the Camera
Press and hold the power button, The LCD display will light up (one beeping sounds). It enters video mode, The time displayed on screen is the remaining time for taking video, the first two numbers display hours, the last two numbers display minutes.
Press and hold the power button for 2 seconds, The LCD display OFF (you will hear beeping sounds), and then the LCD display will turn off after 1 second.
Normal Video Recording
Press the “Shutter” button to start recording. The LCD backlight flickers.
The LCD will display the recorded time. The first two numbers display minutes, the last two numbers display second.
Press the “Shutter” button again to stop recording, the LCD backlight stay on. The LCD will display the remaining time.
When SD memory is full, LCD will display “FULL” and stop recording.
Note: Using 2 AA alkaline batteries to turn on the camera, it is under Normal recording mode, and It will save the footage of recording every other 5 minutes.
Loop Recording
When camera is off with 2XAA battery in it, plug it into USB Charger, it will turn on automatically and enter loop recording mode to take video footage automatically. Press “Shutter key” to stop recording and it will save footage videos.
Under Loop recording mode, when plug out the charger, camera will stop recording and turn off after 2 seconds ,.
When camera is off without 2XAA battery, plug it into the USB charger for 6 seconds, the camera will turn on and begin to record automatically. Press “Shutter button” to stop recording and it will save footage videos. If plug out the USB charger, it will shut off immediately.
Note: Connect camera to USB Charger to recording, it will save the footage of recording every other 2 minutes. When SD card is FULL, it will overwrite the early videos footage by time sequence and continue recording.
Deleting video footage
Press and hold Menu button for 2 seconds to enter into menu setting. Press once “Shutter button” the VGA icon flickers , press again “Shutter button” to enter deleting menu, the letter “D” (means delete)exist on the LCD screen, the first item display “NO”, means delete no file; press Shutter button again, the second item display “ONE”, press “Menu button” to delete the last recorded video footage, press twice “Shutter button” to quit; Press again “Shutter button”, the third item display “ALL”, press again “Menu button” to delete all the video footage. To quit the menu and return to video mode, press again “Shutter button”.
Playing back video footage on TV
1. Turn the camera on and connect it to TV by using the AV cable. \"AU\" appears on the camera LCD. TV is under the playback status, press Menu button on camera you could select next video footage, and press “Shutter button” to begin to playback the video, press “Shutter button” to pause playback, to continuous video playing, press the “shutter” button again. press “Menu button” will stop the playing.
2. During video playing, Then long press Menu button it will delete the current video footage. When there is no files in camera memory, TV will display “NO FILE”
| Sensor | 1.3Mega pixels CMOS sensor |
| Lens | All glass lens, 54 degree |
| Resolution | 720P 1280x720 (30 FPS VGA 640x480 (30 FPS) |
| Memory | SD Card slot support up to 32G(Not included) |
| File format | AVI |
| Battery | use 2 x AA alkaline batteries |
Turning On/Off the Camera
Press and hold the power button, The LCD display will light up (one beeping sounds). It enters video mode, The time displayed on screen is the remaining time for taking video, the first two numbers display hours, the last two numbers display minutes.
Press and hold the power button for 2 seconds, The LCD display OFF (you will hear beeping sounds), and then the LCD display will turn off after 1 second.
Normal Video Recording
Press the “Shutter” button to start recording. The LCD backlight flickers.
The LCD will display the recorded time. The first two numbers display minutes, the last two numbers display second.
Press the “Shutter” button again to stop recording, the LCD backlight stay on. The LCD will display the remaining time.
When SD memory is full, LCD will display “FULL” and stop recording.
Note: Using 2 AA alkaline batteries to turn on the camera, it is under Normal recording mode, and It will save the footage of recording every other 5 minutes.
Loop Recording
When camera is off with 2XAA battery in it, plug it into USB Charger, it will turn on automatically and enter loop recording mode to take video footage automatically. Press “Shutter key” to stop recording and it will save footage videos.
Under Loop recording mode, when plug out the charger, camera will stop recording and turn off after 2 seconds ,.
When camera is off without 2XAA battery, plug it into the USB charger for 6 seconds, the camera will turn on and begin to record automatically. Press “Shutter button” to stop recording and it will save footage videos. If plug out the USB charger, it will shut off immediately.
Note: Connect camera to USB Charger to recording, it will save the footage of recording every other 2 minutes. When SD card is FULL, it will overwrite the early videos footage by time sequence and continue recording.
Deleting video footage
Press and hold Menu button for 2 seconds to enter into menu setting. Press once “Shutter button” the VGA icon flickers , press again “Shutter button” to enter deleting menu, the letter “D” (means delete)exist on the LCD screen, the first item display “NO”, means delete no file; press Shutter button again, the second item display “ONE”, press “Menu button” to delete the last recorded video footage, press twice “Shutter button” to quit; Press again “Shutter button”, the third item display “ALL”, press again “Menu button” to delete all the video footage. To quit the menu and return to video mode, press again “Shutter button”.
Playing back video footage on TV
1. Turn the camera on and connect it to TV by using the AV cable. \"AU\" appears on the camera LCD. TV is under the playback status, press Menu button on camera you could select next video footage, and press “Shutter button” to begin to playback the video, press “Shutter button” to pause playback, to continuous video playing, press the “shutter” button again. press “Menu button” will stop the playing.
2. During video playing, Then long press Menu button it will delete the current video footage. When there is no files in camera memory, TV will display “NO FILE”
Additional Information
| Payment Terms | T/T, Others |
|---|---|
| Minimum Order | 100PCS |
| Lead Time / Delivery Time | 20 Day(s) |
| Sample Available | NO |
| Target Market(s) | North America, Oceania, Eastern Europe, Africa(except Middle East), Latin America, Western & Southern Europe, Northern Europe, Middle East |


Related Keywords
Related Keywords


