
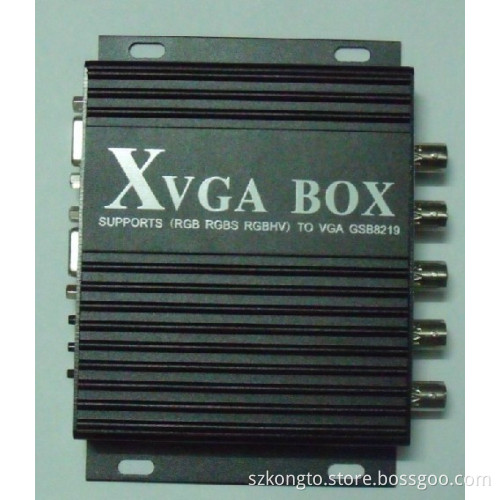
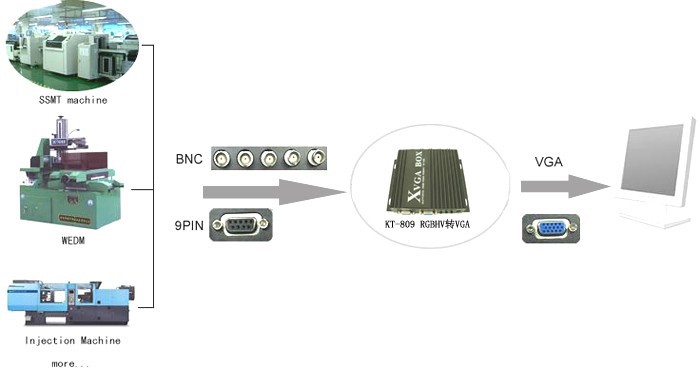
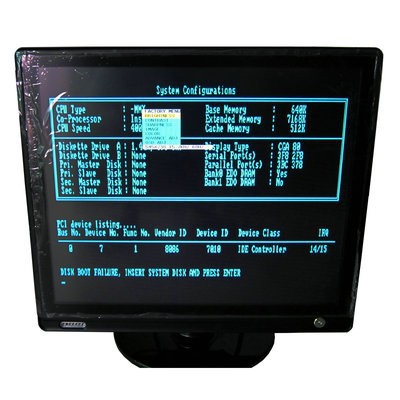
MDA/CGA/EGA/RGB/RGBSog/RGBS/RGBHV/YPbPr/YUV to VGA ,CNC or Industrial device use Video Converter!
- Payment Type:
- Western Union
- Min. Order:
- 1
- Min. Order:
- 1
- Delivery Time:
- 5 Days
- Transportation:
- Air
Your message must be between 20 to 2000 characters
Contact Now| Payment Type: | Western Union |
|---|---|
| Transportation: | Air |
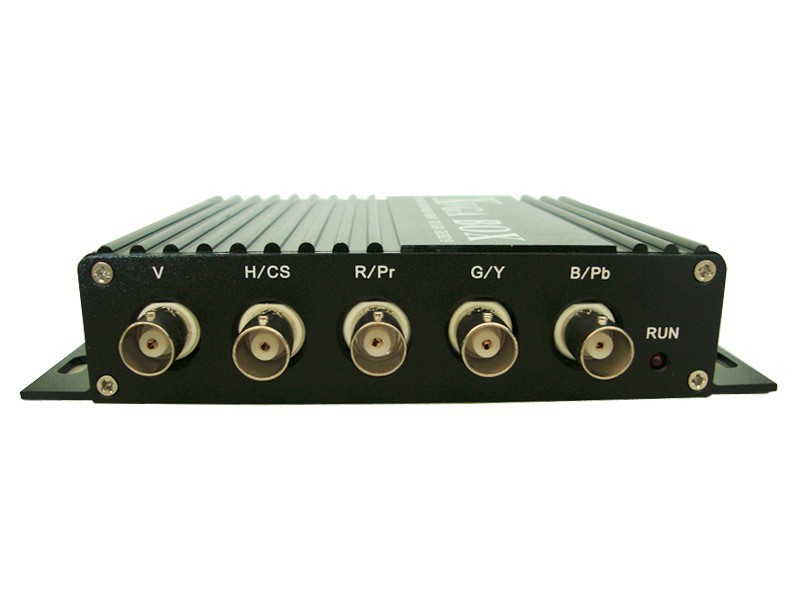
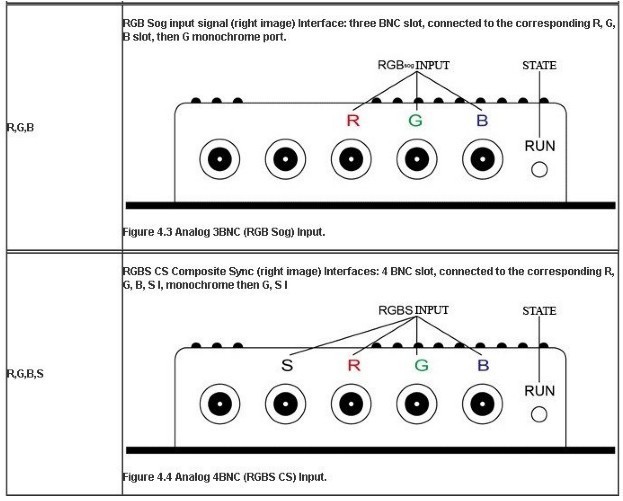
Note:9 Pin and BNC input signal, you can choose one of them.
Quick reference for 8219 interface:Definition for I/O interface
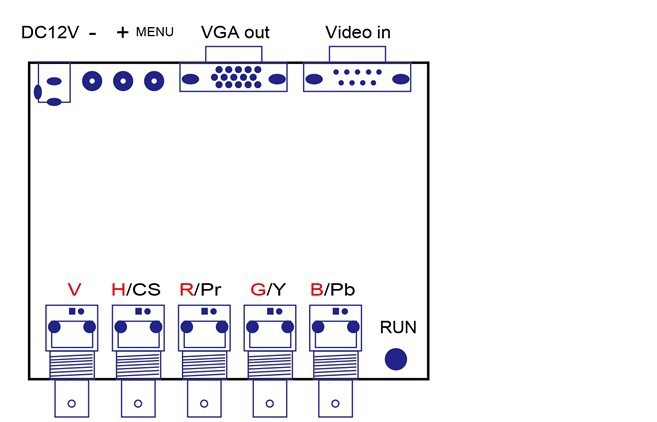
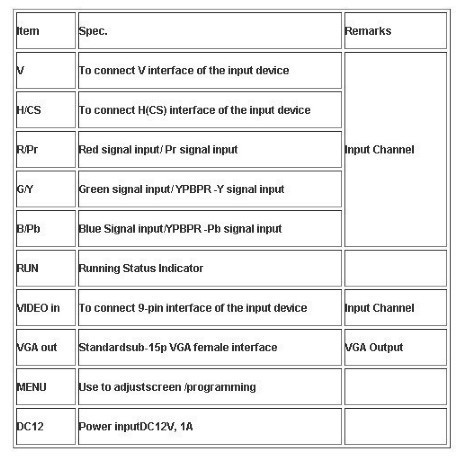
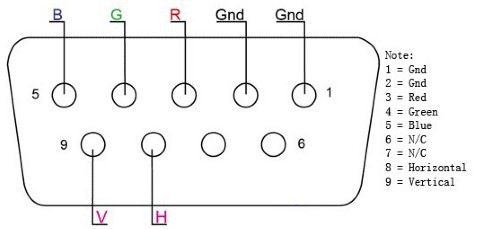
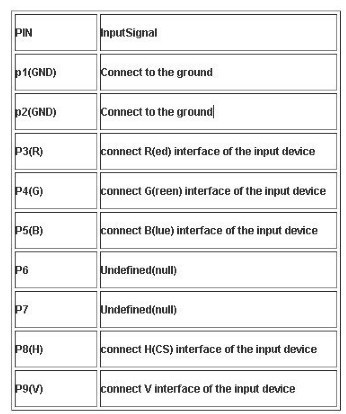
9 Pin D-SUB Reference:Definition for Input Channel II
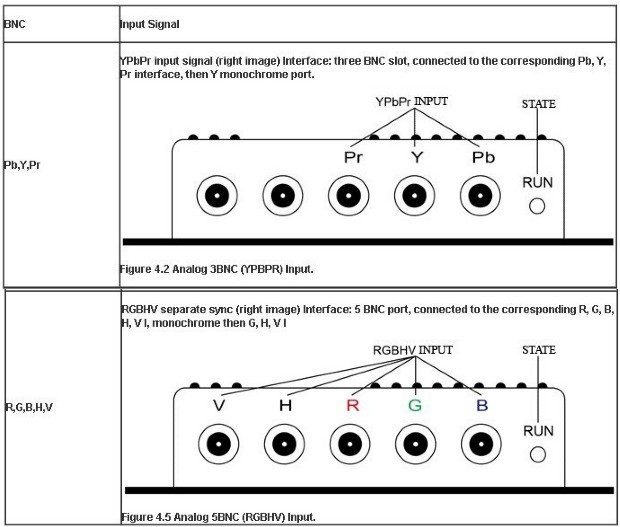
Application for this converter:Definition for Input Channel I
Operation Menu:
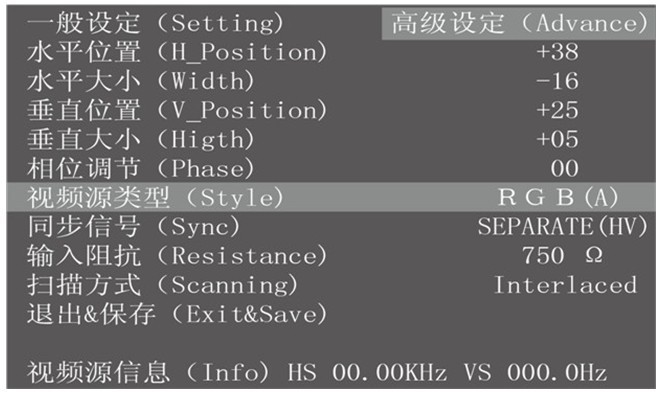
(1)H_Position:Moves the position of the display area on the screen.
(2)Width:adjust the width of the menu
(3)V_Position:Moves the position of the display area on the screen vertically.
(4)Higth:adjust the height of the menu.
(5)Phase:adjust the phase of the menu.
(6)Style:Signal style, RGB(A) Analog,RGB(D) Digital TTL,YUV
(7)Sync:Signal Sync mode:Separate(HV),Composite(S),SOG,SOY. Automatic
recognition of video input sync, or custom of video input sync
(8)Resistance:75 ohm or 750 ohm.
(9)Scanning:Interlaced or Progressive.
(10)Exit&Save:Save and Exit.
(11)automatically save and exit:15 seconds, don`t press any key, the menu
automatically save and exit. (No signal input, the OSD menu will display)
(12)809 Advance menu:Turn on the 809 power, Press and hold the Menu buttons
simultaneously until the 809 Advance menu display, about 5 to 8 seconds.
(13)Restore the factory defaults for 8219:Turn off the 8219 power, Press and hold the
Menu buttons simultaneously until the kt809/8219 power on,about 3 to 5 seconds.
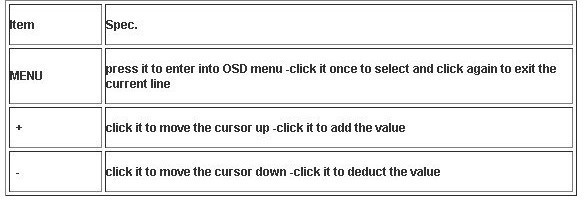
Control buttons:
Using the Screen Adjustment Menu
(OSD:On Screen Display)
STEP 1
Connected to signal, no display or display color is not correct, adjust the Signal style ( RGB(A) Analog/RGB(D) Digital TTL/YUV).
STEP 2
809 can automatically identify the sync signal, if the display distortions that need to manually adjust the sync signal(Separate(HV)/Composite(S)/SOG,SOY).
STEP 3
If the screen shows elongated, and the overflow to the bottom of the screen, choose the scanning mode adjusted: Progressive; or screen display is still only half of the monitor, choose the scanning mode to adjust to: interlaced.
STEP 4
Adjust the horizontal position, horizontal size, vertical position, vertical size of the item, adjust the monitor to display properly.
STEP 5
Input impedance: Select the correct input impedance.
STEP 6
Adjustment the phase until the display clearly.
STEP 7
Save and exit
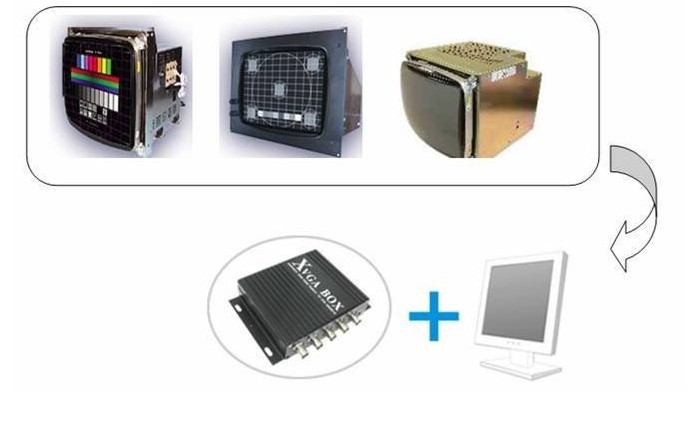
The upgrading replacement for old CNC crt monitor as follows: replaceable model list


Related Keywords

